Monday, October 31, 2011

How to: Make Chocolate Truffles

My friend Danny talks about making truffles all the time.  We finally tried it out the other day.  Other than having too strong of a brandy taste, they were pretty good!  He found an Alton Brown Food Network recipe...it's below.

10 ounces bittersweet chocolate, chopped fine (we bought ours from Trader Joes)
3 tablespoons unsalted butter (we used salted)
1/2 cup heavy cream (the carton normally says heavy whipping cream)
1 tbsp. light corn syrup
1/4 cup brandy (I would suggest omitting this)

1/2 cup Dutch process cocoa powder, finely chopped nuts, and/or toasted coconut, for coating truffles (We only used Ghiradelli cocoa powder)
8 ounces semisweet or bittersweet chocolate, chopped fine (we used the same chocolate as above)


1. Place the 10 ounces of chocolate and the butter in a microwave safe bowl and microwave it for 30 seconds.  Remove, stir, and heat for 30 more seconds.  Set aside.


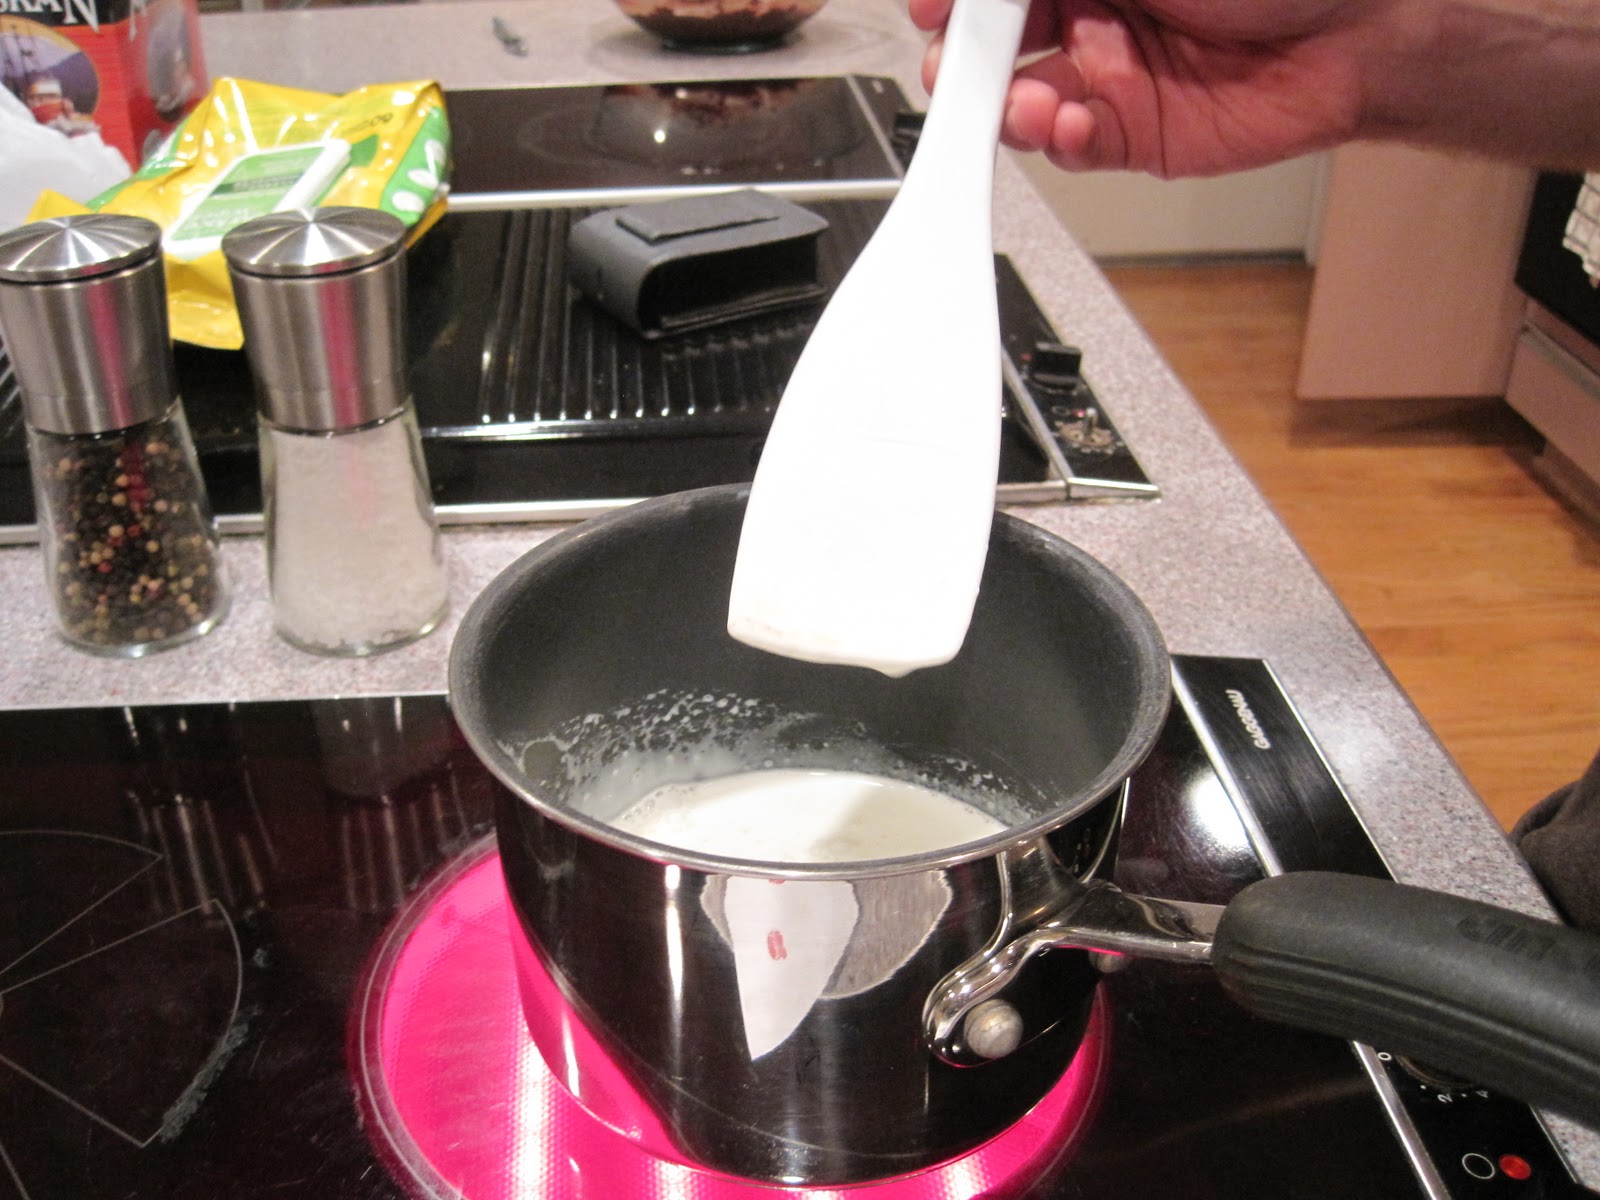
2. Heat heavy cream and corn syrup in a small saucepan over medium heat until simmering (simmering means a low boil). Remove from heat and pour the mixture over the melted chocolate mixture; let stand for 2 minutes. Using a rubber spatula, stir gently, starting in the middle of the bowl and working in concentric circles until all chocolate is melted and mixture is smooth and creamy. Gently stir in the brandy. Pour the mixture into an 8 by 8-inch glass baking dish (really you just want a shallow layer of chocolate) and place in the refrigerator for 1 hour.


3. Using a melon baller (or two teaspoons like us), scoop chocolate onto a sheet pan lined with parchment paper and return to the refrigerator for 30 minutes (a little longer might be better as ours were too soft).


4. Place the cocoa powder, nuts, and/or toasted coconut each in its own pie pan and set aside.


5. Place the 8 ounces of chocolate into a medium mixing bowl which is sitting on top of a heating pad lined bowl, with the heating pad set to medium. Depending on the heating pad, you may need to adjust the heat up or down. Stirring the chocolate occasionally, test the temperature of the chocolate and continue heating until it reaches 90 to 92 degrees F; do not allow the chocolate to go above 94 degrees F (ours definitely got hotter). If you do, the coating will not have a nice snap to it when you bite into the chocolate. Once you have reached the optimal temperature, adjust the heat to maintain it.

6. Remove the truffles from the refrigerator and shape into balls by rolling between the palms of your hands.


7. Dip an ice cream scoop into the chocolate (we failed at this and just threw the truffles into the melted chocolate) and turn upside down to remove excess chocolate. Place truffles 1 at time into the scoop and roll around until coated. Then place the truffle into the dish with either the cocoa powder, nuts or coconut. Move the truffle around to coat; leave truffle in the coating for 10 to 15 seconds before removing. In the meantime, continue placing the chocolate-coated truffles in the cocoa or other secondary coating. After 10 to 15 seconds, remove the truffle to a parchment lined sheet pan. Repeat until all truffles are coated.


8. Allow to set in a cool dry place for at least 1 hour; or store in an airtight container in the refrigerator. Truffles are best when served at room temperature.

Saturday, October 29, 2011

Book Review - Good-to-Go Cafe


I am so lucky to work for a wonderful woman by the name of Barbara Greenleaf.  She has done it all and she is now writing a series of books for teen entrepreneurs.  Her latest book is called Good-to-Go Cafe and it shouldn't be missed!

This book is about a young man named Enrique.  His mom is Jewish and his dad is Mexican.  Enrique works in his grandpa's deli and eventually decides to try out some food businesses of his own.  The plot also delves into peer pressure, special needs kids and more.

While I don't normally read young adult books, I am glad I work for Barbara and get to read her books!

You can buy Barbara's book on Amazon or from her website.

Thursday, October 27, 2011

Trick or Treat Hop

Trick-or-Treat Hop

Halloween is one of my favorite holidays...probably because I love candy!  I am participating in an awesome Halloween hop hosted by Tales from the Nursery, Formula Mom and Mama on a Green Mission.  There are over 100 blogs participating and each giveaway is worth at least $25!  The giveaway hop goes through November 2nd so you have until after Halloween to enter everyone's giveaways!

My prize is:

A $50 Jafra Cosmetics Gift Certificate.  If you have never heard of Jafra, they are a skincare company that has been around for over 50 years!  They sell all kinds of products including cleansers, moisturizers, makeup, fragrances, men's products, baby products, and more!

Some examples of their awesome products are:

Balance DYNAMICS Basic Set

Royal Jelly Body Complex

Ultra Nourishing Gold Moisturizer

Not only does Jafra carry great, high-quality products, but their website instructs you on how to use the products!

Melanie is offering a special for all of my readers.  You can all get 20% off anything you order from her if you mention my blog!

After you enter my giveaway, be sure to check out the linky below and enter all of the other giveaways!

To enter Rafflecopter giveaways, read the directions for each task, do each task and click "I did this" after completing each one.


The prizes are being provided by the sponsor, Melanie.  I received samples in exchange for my blog post.

Wednesday, October 26, 2011

Caramel Corn

My friend went on a trip a short time ago and the lady he was staying with made him caramel corn.  Ever since, he has been talking about making it.  So the other night, we went for it!  He found a recipe on JoyOfBaking.com, we bought the ingredients, and we were ready :)

The recipe says it makes 8 servings.  I don't know how big a serving is but I do know we made a double batch!

1/2 cup popcorn kernels or about 10 cups of popped corn
1 1/2 cups granulated white sugar
1/2 cup packed dark brown sugar
1/2 cup light corn syrup
1/2 cup water
2 tbsp. butter
2 tsp. kosher salt
2 tsp. baking soda

The recipe suggests popping the popcorn and then placing it in a 120 degrees F oven in a stainless steel bowl to stay warm.  We just popped the popcorn right before we were ready to coat it though.

This recipe calls for the use of a candy thermometer, which I do not own, so I am going to list times to do things instead of temperatures.

1. In a large, heavy-bottomed saucepan, stir together the sugars, corn syrup and water.  Place the saucepan over medium heat and bring it to a boil, stirring occasionally.
2. Once the mixture boils, cover it and boil it for another minute or two.
3. Uncover the mixture and boil it over medium heat, stirring occasionally for 4-5 minutes until it reaches the soft ball stage.  At this point, stir in the butter.
4. Continue to cook the caramel, stirring occasionally, for another 4-5 minutes until it reaches the hard crack stage.
5. The directions here say to remove the saucepan from the heat and add in the salt and baking soda.  We found it mixed in better if we left the saucepan on the heat.  The caramel foams when you add the baking soda!
6. We spread our popcorn out on a deep baking dish covered in tinfoil (I think we used the bottom part of a broiling pan and I think wax paper would have been better), poured the caramel over the popcorn and stirred with wooden spoons.  Spread the mixture out.  While it is still hot, separate it into bite-size pieces (don't use your hands).
7. We added the step of warming the mixture in the oven to make the caramel corn a little crispier.

8. Enjoy!

Monday, October 24, 2011

Haircut!

It's that time again....time to donate my hair to Locks of Love.  They are a great organization that provides wigs to kids.  I donated to them a few years ago and this is now my second time.  Last week my sister and Nana tried a new salon in Santa Barbara called The Color Room.  They both loved their hairdos so much that I booked an appointment with Chelsea.  Below are the before and after shots:

The back of my hair...ugh it grew out funny

The front of my hair...excuse my lack of smile!

The new back of my hair.  It's so nice and even and layered!

I made an attempt at smiling for this picture. :)

I am sooooooooo happy with my new haircut and with Chelsea at The Color Room.  I will definitely be going back there!

Saturday, October 22, 2011

Book Review - 1105 Yakima Street by Debbie Macomber


I am a huge Debbie Macomber fan!  I wait every year for September to come around and her next Cedar Cove book to come out.  #11 - 1105 Yakima Street recently came out and I immediately bought it!  I was super sad to learn though that #12 is coming out around Xmas time and then the series is coming to an end.

This book splits most of its focus between Rachel, her husband Bruce & his daughter Jolene, Ben & his wife Charlotte, and Linc & his wife Lori Wyse. Rachel has moved out of her home due to her constant fighting with Jolene.  Ben and Charlotte have a fire in their house and are starting to show signs of their age.  Linc and Lori are having neverending problems due to Lori's dad not approving of Linc.  I feel like I really know all of these characters at this point and I am always rooting for all of them!

1225 Christmas Tree Lane

Throughout the book they also talk a bit about Beth Morehouse, who the final book #13 will be about.  Beth's address is 1225 Christmas Tree Lane.  She rescues dogs and sells Christmas trees and I can't wait to get to know her better!

I am sad that Debbie Macomber will be ending this series but I can only hope she starts up a new one!

Thursday, October 20, 2011

SB Axxess Year 3 #1

My sister and nana wanted me to take their picture!

As I posted about recently, I just got my new Santa Barbara Axxess card.  Last Friday, I decided to bring my grandparents, mom and sister to lunch at Max's Restaurant.  I had only been there once before but after looking at the menu thought it would be a place that everyone could find something to eat.  The Axxess deal was to buy one entree, get one free (and you get 10% off each trip after).  We saved $9.95.

The eggplant sandwich with a side salad.

Max's lunch menu has salads, sandwiches, burgers, wraps and pastas and more.  They also have breakfast which a few of us ordered.  For breakfast they have pancakes, omelets, scrambles and more.  Their items are all fairly reasonably priced, and generally range from $7-12.

The lorraine scramble with yummy breakfast potatoes.  This was my dish and it was amazing!

There were 5 of us total.  We ordered a brie omelet, lorraine scramble, blt, tuna melt and eggplant sandwich. Everyone loved their food!  It was all delicious.  The scramble and omelet were both huge and really tasty.  The sandwiches were cooked perfectly and the fries that came with them were so crunchy!

The BLT with the great fries!

This is a restaurant I would highly recommend...but make sure they are open before you go because they have weird hours sometimes!

Brie omelet with yummy potatoes.

I want to be clear that I bought the Axxess Book on my own and went to the restaurant on my own.  I received nothing from any mentioned company.

Tuesday, October 18, 2011

Winner - Family’s Best Friend Blog Event

This summary is not available. Please click here to view the post.

Saturday, October 15, 2011

Cornbread Waffles

A while back, I was reading People Magazine and saw a fabulous looking recipe for cornbread waffles.  I love cornbread and I love waffles, so I was eager to try these.

The recipe says it serves six.  It served three of us plus we had tons of leftovers!

1 1/2 cups cornmeal
1 cup flour
1 tbsp. baking powder
1 tsp. salt
3 tbsp. sugar
2 1/2 cups buttermilk
1/4 cup soybean or vegetable oil (we used vegetable oil)

1. Preheat a waffle iron.
2. Whisk dry ingredients in a large bowl.


3. Add buttermilk and oil and whisk until smooth. (We don't own a whisk so we stirred)


4. Spray a heated waffle iron with cooking spray. (You have to spray it before putting each waffle in)  Add 2/3 cup batter and cook until crisp and lightly browned, 5-6 minutes.


5. Serve warm.


We put a little bit of butter and syrup on ours.  They were so delicious!

Monday, October 10, 2011

Santa Barbara Axxess Blogging...Year 3

My town, Santa Barbara, has their own book like the Entertainment Books. It is $30 each year and starts on Oct 1. These books have tons of discounts on golf, retail stores, restaurants, amusement parks and more.  This year, they are good for 15 months instead of just 12!

Two years ago, I was determined to use my card more than the 6 times I had used it the year before. Well, I used my card exactly six times last year as well.

I have to do better this year.  I want to use my card to its fullest.  I want to blog about local restaurants.  I want to use it at some businesses that aren't restaurants!

Wish me luck!

13th Edition Available Now

Saturday, October 8, 2011

Yom Kippur

Taking a bloggy break for Yom Kippur.  If you fast, I hope you have an easy fast!

Friday, October 7, 2011

Family’s Best Friend Blog Event

Pet Event

Woohoo, I am participating in a super fun pet giveaway event.  There are almost 30 blogs participating and each giveaway is worth at least $50!  October is National Adopt a Dog Month.  This giveaway hop is hosted by MomVantage and Tales of a Ranting Ginger.  The giveaway hop goes through October 13th so you have about a week to enter everyone's giveaways!

My prizes are:

1) 1.5 pounds of treats from Hungry Hound Dog Bakery

Peanut Butter Banana Dog Treats -  8oz.
Peanut butter banana dog treats...just one of your options!

2) A large pet mat from Too Cute Custom Crafts

Pet-Mat (Placemat for your Dog or Cat's Bowl) Red or Blue Leavest: Small Size
Your choice of red or blue mat

3) A dog toy from Wags and Wiggles

No Stuffing Dog Toy - Knotty Boy
This is what I would pick for Hunter if I won...but you get to choose your own favorite!

4) A $10 Amazon gift certificate from me to buy the dog item of your choice.

After you enter my giveaway, be sure to check out the linky below and enter all of the other giveaways!

To enter Rafflecopter giveaways, read the directions for each task, do each task and click "I did this" after completing each one.


The prizes are being provided by the sponsors and me.  I did not receive any compensation or samples for this post.

Thursday, October 6, 2011

Going on a road trip and through the self checkout lane


I decided to try out a new meme called "W.T.F. meme".  And in case you were wondering, W.T.F. stands for Wednesday, Thursday, Friday.  Anyhow...

1) The Thought Catalog has posted "7 Reasons Why You Should Go On A Road Trip." If you could go on a road trip today, where would you go and who would go with you?  I would go back up to Idaho...and I would take my dad of course!  No one else could get us there faster!


Who could resist these faces????

2) Apple co-founder Steve Jobs died this week, leaving behind a legacy of valuable technological contributions. What type of legacy do you hope to leave after you die?  I really just want people to remember me as super nice...and maybe having a fantastic sense of humor!

3) When you’re shopping at a store that includes a self checkout system, do you use the self checkout registers or go through a traditional register being manned by a cashier?  I go wherever the line is shortest, I am not picky!!!

4) What is the title of a self-help book that you'd never want to see on a store bookshelf?  How to talk to yourself...hahaha

5) Can there ever be too much white at a wedding?  I think so...white gets dirty!  Color is fun!

6) If you could spend a year with any fictional character, who would you choose and why?  I think I would choose Rory from Gilmore Girls.  She is just awesome!


7) CMT is premiering a new show this weekend titled "Top Secret Recipe," on which best-selling cookbook author Todd Wilbur will attempt to duplicate many dishes from famous restaurants. What is one food item you wish you could easily duplicate at home instead of buy at a restaurant?  Delicious cheesy garlic bread.  Restaurants overcharge but there are some places in town that just can't be beat!

8) Is there anyone that sends you text messages and makes you smile instantly?  Yes...but I can't name them on my blog!

Wednesday, October 5, 2011

Invisalign - Update

I have had my Invisalign in for about 11 weeks now. I am way more used to it and only experience some pain the first few days of some new aligners. Some aligners hurt more or less than others. I thought I would put up a picture from the beginning and a picture from now. While I feel a big difference, I don't see much of one.

The beginning

The beginning

Now....you can barely see the bottom teeth show more now.


Sorry if these pictures weirded anyone out LOL